

Mushroom season is here 🍄 Now's a good time to plant mushroom beds and inoculate logs! Browse our outdoor range
Thinking of ordering for Christmas? Select the ‘Xmas Pre-order’ option to reserve your kits for December delivery 🎁

Outdoor Mushroom Bed Instructions
For all outdoor sawdust spawn kits
This method of growing mushrooms outdoors will work for our blue oyster, phoenix oyster, poplar fieldcap, and wood blewit sawdust spawn kits. All of the outdoor kits use UK-native strains isolated from wild fruiting bodies.
Each species of mushroom is a different growing experience. Even if you have grown mushrooms before, please read the instructions for your kit carefully before proceeding. If you run into any problems please see our FAQ.
Step 1: Finding an Ideal Location
Mushrooms grow best outdoors in moist, but not waterlogged, soil that is out of direct sunlight and shielded from the wind.
When growing mushroom outdoors, you have the choice of creating a bed in a designated area of the ground, using an existing raised bed cleared of weeds, or setting up a large planter that can accomodate the sawdust spawn an the additional substrate you'll be adding.
If you'll be using a container, it's important that it has drainage holes so that the substrate doesn't become waterlogged, which will suffocate the mycelium!
-
Find a spot in your garden/allotment or place your planter in a place that is shady and sheltered.
-
If you cannot find a spot with enough shade, you may use a tarp to act as a sun and wind shield.
-
It's worth bearing in mind that other creatures enjoy mushrooms as much as you do. Slugs can be a particular problem when the weather is very wet. If this is a problem in your garden or allotment, we recommend using organic, non-toxic means such as copper tape, sheep wool pellets or barrier methods to protect your mushrooms.
Step 2: Preparing Your Additional Growing Medium (Substrate)
In nature, fungi break down organic matter such as dead trees and leaves. We can imitate this process by using commonly found organic materials such as sawdust, straw and cardboard as additional growing medium (substrate) to increase the yield of your kit.
Choosing your additional substrate:
It's important to choose the most appropriate substrate for the species of mushroom you are growing for best results.
Sawdust and fresh wood chips:
This must come from hardwood trees. Softwood from coniferous trees is tougher for fungi to break down, one of the reasons being it contains compounds that inhibit fungal growth. Phoenix oyster is an exception in that it can feed on coniferous wood, but it will still perform better on hardwood such as oak, beech, birch, sycamore etc.
→ Best for oyster and poplar fieldcap mushrooms.
Straw:
Oyster mushrooms in particular do very well on straw. The large surface area means that your cultivated fungi can spread into it quickly. Clean, untreated straw such as that sold for animal bedding is ideal.
It's important to use straw rather than hay - hay comes from cut grass with the leaves and sometimes seed heads still attached, meaning it is much higher in nitrogen and can attract competing growth from moulds and bacteria.
→ Suitable for oyster mushrooms. Can be used in addition to wood chips for poplar fieldcap mushrooms.
Leaf litter and partially decomposed wood chips, bark chips and twigs:
In the wild, wood blewits thrive in areas rich in partially decomposed leaf litter and woody material, which is why they are commonly found growing in wooded areas. To recreate a similar environment, you can use a mix of aged wood chips and bark chips, leaf litter, and twigs. It's better if the leaf litter is also old and starting to break down. If you only have dry leaves available these can also be used if hydrated in a bucket of water for no more than 12 hours and then thoroughly drained.
→ Suitable for wood blewits
Garden compost and composted manure:
This is what we recommend for growing shaggy mane mushrooms, together with some non-composted woody material and garden waste to provide structure. It is important that the manure is composted rather than fresh.
→ Recommended for shaggy manes only
Cardboard:
Useful for lining the bottom of the bed. Should be plain brown cardboard that isn't coloured and coated in anything that makes it shiny. The cardboard box and the brown tape used to package your kit are completely biodegradable, so that's usually a good place to start!
No additional substrate to hand?
Not to worry! You can simply bury the entire block (keep it whole and don't break it up) in a shady location underneath no more than 2 inches of soil.
Prepping your additional substrate:
-
Gather your additional substrate in a large bucket. Cover with water and leave to soak for no more than 12-24 hours depending on how dry it is. You want it nicely moist like a damp sponge, but not completely sodden and mushy.
-
Thoroughly drain off any excess water.
-
If you're using freshly cut woodchips, you won't need to rehydrate them since they will already contain enough moisture.
Important considerations - planting in winter
It’s best not to plant your mycelium when the weather is very cold and the ground is frozen, as the spawn won’t establish well. In winter, mycelium will grow more slowly or go dormant due to the cold. If planting during cold months, we recommend not breaking up the spawn to minimise the surface area so that it is less vulnerable to the elements. Instead, bury the whole block in a hole together with some of your additional substrate, then cover with soil. You can try boosting yields later by adding more material once the weather warms up (see “Initiating The Next Flush” step at the bottom of the page).
Otherwise, see Step 3 below for instructions to plant your mushroom bed by layering your substrate and sawdust spawn.
Step 3: Planting The Mycelium
-
If you do not have any extra material to add, you can simply bury the whole block under 1-2 inches of soil without breaking it up. This will produce mushrooms faster, but you will get a smaller harvest of mushrooms overall.
-
Dig a hole in your chosen location big enough to accommodate your mycelium block and additional substrate. You want it to be 6-8 inches deep (not too deep or the substrate and mycelium will become too compacted).
-
-
Wash or sanitise your hands.
-
Line the hole with sheets of brown cardboard.
-
Thoroughly break up your mycelium block inside the bag so that it will be easy to sprinkle evenly with no large lumps.
-
Now it's time to fill the hole with layers of substrate and the broken-up mushroom spawn. Build it up like a lasagna by alternating layers of substrate and your spawn, aiming for around 1-2 inches for each layer of substrate and a thin, even layer of mushroom spawn over the top of each substrate layer.
-
Once filled to the top, cover over your hole with a thin layer of soil. You can optionally apply a thin 1 inch layer of mulch if planting during hot and dry or cold months.
-
Generously water your new mushroom patch.
For more outdoor growing methods, check out our guide to growing mushrooms outdoors.
Important: You cannot mix sawdust spawn of different species together in the same bed, as different species will compete with each other. Make sure to use blocks of the same species.
Step 4: Maintenance
-
Thoroughly water your mushroom patch during dry spells or when the soil looks dry.
-
Over time the mycelium will colonise the additional substrate, and when outside conditions become favourable mushrooms will begin to grow.
-
Your mushrooms will likely grow in spring, summer or autumn months depending on the time of planting. They will not generally fruit in winter, but it is fine to plant your kit any time of year and simply wait for a change in seasons. Depending on when you plant, your mushrooms will be ready to harvest in 2- 6 months.
-
When your mushrooms begin to sprout, make sure to keep their bodies moist by using the sprinkle head on a watering can.
Step 5: When to Harvest
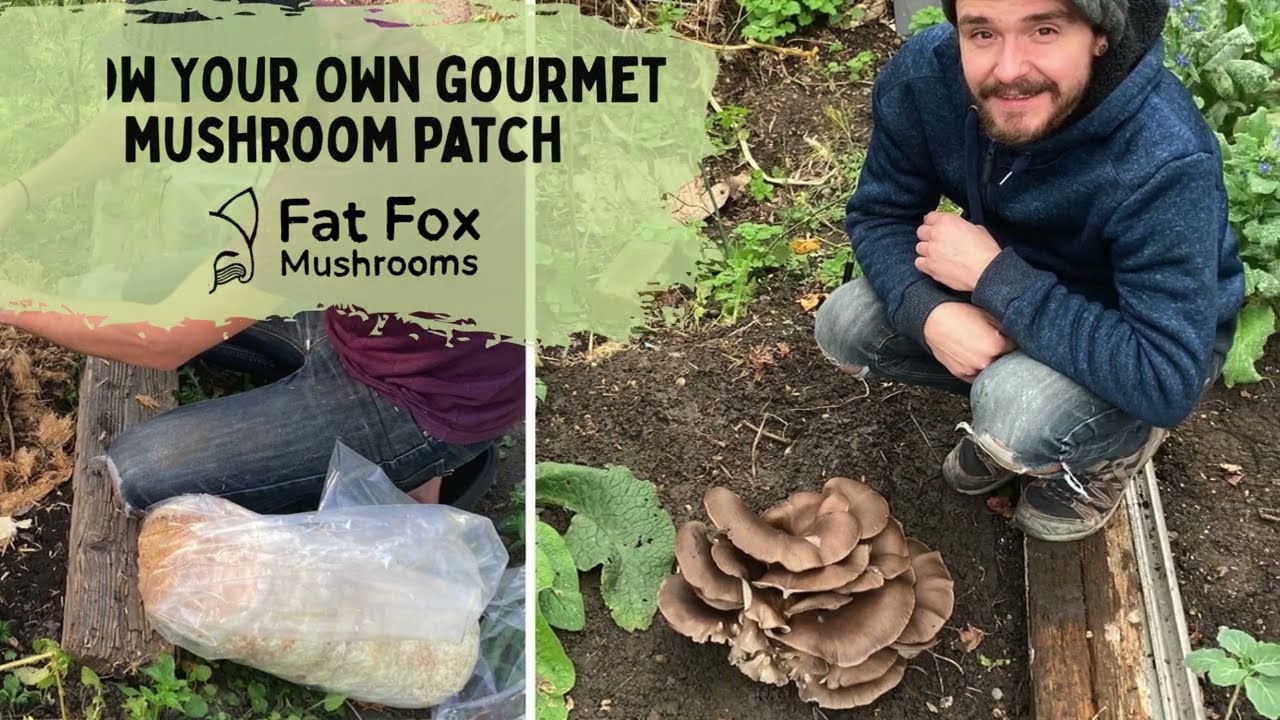
Let your mushrooms grow to the desired size, but harvest before the edges have started to fray. Your mushrooms may grow in one large cluster, or in several clusters across a larger area.

A cluster of mature blue oyster mushrooms

Several clusters of blue oyster mushrooms still growing.
Step 6: Harvest
To harvest, simply twist an entire bunch from the ground. Do not cut the mushrooms off at the base, as any leaving any bits of mushroom may attract slugs, bugs or animals that are keen to eat your mushrooms.


Clean your mushrooms of and dirt or debris. You can store you oyster mushrooms in the fridge for up to a week
Step 7: Initiating The Next Flush
After harvest, water your mushroom patch well to promote more mushrooms. Your next flush could sprout in as little as a few weeks, however they are most likely to sprout again when the season changes. You should expect two to three crops of mushrooms before the growing medium is spent and you are left with your bed of mushroom compost.
Tips:
-
You can try refreshing your mushroom patch by gently raking the top and adding fresh, hydrated organic materials on top after 6-12 months.
-
Once your patch has matured (12+ months), check that there is still healthy white mycelium growing by gently digging down to inspect the lower layers. Material with healthy white mycelium growing on it can be used to start another mushroom patch!
Step 9: Mushroom Compost
Did you know that fungi play a key role in storing carbon? Trees and plants remove carbon from the atmosphere and fungi break down plant waste to create new carbon-rich soil. Clean air, healthy soil and delicious mushrooms: just one of the many ways fungi are incredible!
Mushroom compost is a valuable resource in the garden due to its high moisture holding capabilities. It is best used as a base layer for planting to help protect plants against drought. You can dig up and transplant your mushroom compost into the garden, hanging baskets or pots.

We hope you've enjoyed growing your mushrooms!
We're passionate about sharing the diversity of the fungi kingdom & making more of its edible & medicinal delights easy to grow. Want to try another strain or learn how to cultivate mushrooms? See our full range of mushroom growing kits and cultivation workshops!